Tag Archives: tips

What Is: Lunchothorax?

Here’s an operative tip for trauma professionals who find themselves in the OR. Heard of “lunchothorax?” I’m sure most of you haven’t. The term originated in a 1993 paper on the history of thoracoscopic surgery. It really hasn’t been written about in the context of trauma surgery, though.

Lunchothorax is an empyema caused by pleural contamination in patients with concomitant diaphragm and hollow viscus injury. This most commonly occurs with penetrating injuries to the left upper quadrant and/or left lower back. The two penetrations tend to be in close proximity (diaphragm + stomach), but may occasionally be further away (diaphragm + colon).

One of the earlier papers describing the correlation of gastric injury and empyema was written by one of my mentors, John Weigelt. Although gastric repair is usually simple and heals well, his group did note a few severe complications. Of 243 patients with this injury, 15 developed ones that were considered severe, and 10 of those were empyema! What gives?

It turns out that the combination of gastric contents and pleural space is not a good one. It’s not really clear why this is. Is it bacterial? The acid? Undigested food? I’ve seen cases with what I would consider minimal contamination go on to develop a nasty empyema. This is also borne out in a National Trauma Databank review from 2009. It looked at complications in patients with a diaphragm injury and found that a gastric injury increased the probability of empyema by 3x. Interestingly, there was no increased risk of empyema with a concomitant colon injury.

Bottom line: Lunchothorax, or empyema after even minimal contamination from a hollow viscus, is a dreaded complication of thoraco-abdominal penetrating injury. Any time the stomach and diaphragm are violated, I recommend thoroughly irrigating the chest. It’s probably a good idea for concomitant colon injury as well, but there’s less literature support.

This can be done through the diaphragm injury if it is large enough, or through a chest tube inserted separately. Most of the time, you’ll be placing the chest tube anyway because the pleural space has been violated via the abdomen. In either case, copious lavage with saline is recommended to clear all particulate material, with a few extra liters just for good measure. There’s no data on use of antibiotics, but standard perioperative coverage for the abdominal injuries should be sufficient if the lavage was properly performed.

References:

  • The history of thoracoscopic surgery. Ann Thoracic Surg 56(3):610-614, 1993.
  • Penetrating injuries to the stomach. SGO 172(4):298-302, 1991.
  • Risk factors for empyema after diaphragmatic injury: results of a National Trauma Databank analysis. J Trauma 66(6):1672-1676, 2009. 

Trauma Surgery Tip: How To See The Unseeable – The Answer

Yesterday I posed a scenario where the surgeon needed to see an area of an open abdomen (trauma laparotomy) that could not easily be visualized. Specifically, there was a question as to whether the diaphragm had been violated just anterior to the liver, just under the costal margin.

Short of putting your head in the wound, how can you visualize this area? Or some other hard to reach spot? Well, you could have an assistant insert a retractor and pull like crazy. However, the rib cage might not bend very well, and in elderly patients it may break. Not a good idea.

Some readers suggested breaking out the laparoscopy equipment and using the camera and optics to visualize. This is a reasonable idea, but expensive. Shouldn’t there be some good (and cheap) way to do this?

Of course, and there is. Think low tech. Very low tech. You just need to see around a corner, right. So get a mirror!

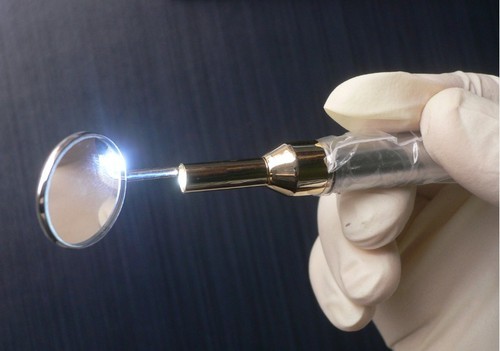
Every OR has some sterile dental mirrors lying around. Get one and have your assistant gently hold the liver down while you indirectly examine the diaphragm. Since you’re probably not a dentist, it may take a minute or two to get used to manipulating the mirror to see just what you want. But if you can manage laparoscopic surgery, you’ll get the hang of it quickly.

And if you need more light up in those nooks and crannies? Shine the OR light directly into the abdomen, then place a nice shiny malleable retractor into the area to reflect light into the area in questions. Voila!

Bottom line: A lot of the things that trauma professionals need to do in the heat of the moment will not be found in doctor, nurse, or paramedic books. Be creative. Look at the stuff around you and available to you. Figure out a way to make it work, and make $#!+ up if necessary.

Trauma Surgery Tip: How To See The Unseeable

Let me present a scenario and first see how you might solve this problem.

A young man presents with a gunshot to the abdomen in the right mid-back. He is hemodynamically stable, and you get a chest xray. It shows a small caliber slug in the right upper quadrant, but no hemo- or pneumothorax. He has peritoneal signs, so you whisk him off to the OR for a laparotomy.

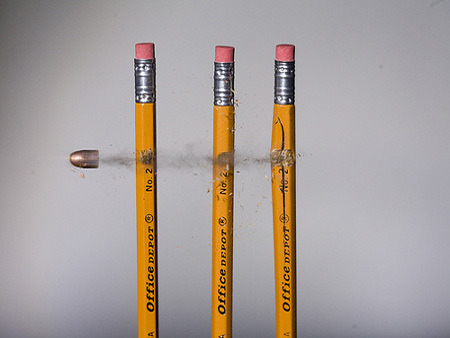
As you prep the patient for the case, you can feel a small mass just above the right costal margin. You incise the area and produce a 22 caliber bullet. Of course, you follow the chain of evidence rules and pass it off for the police. As you explore the abdomen, it appears that there are no gross injuries. You are concerned, however, that there may be an injury to the diaphragm in proximity to the bullet.

So here’s the question: how can you visualize the diaphragm in this area? The bullet was located below the right nipple. But the diaphragm in this area is covered by the liver, and is parallel to the floor. You can’t seem to feel a hole with your fat finger. But short of putting your whole head in the wound, you just can’t get a good angle to see the area in question.

How would you do it? Please tweet or leave comments with your suggestions. I’ll provide the answer(s) tomorrow!

Practical Tips: Transferring The Mangled Extremity

Managing the mangled extremity is both challenging and intense. There is always pressure to do all we can to save that threatened limb. But as you know, different levels of trauma centers have different capabilities and specialists that are needed to fully manage these injuries.

Level I centers have a comprehensive set of specialists to deal with the managed extremity, including trauma surgeons, vascular surgeons, orthopedic surgeons comfortable with complex injury, plastic surgeons, and interventional radiologists. The expectation is that a mangled extremity can be completely managed at such a center.

Level III centers have much more limited resources, and may only have a trauma surgeon to perform the initial evaluation. Definitive management can only occur after transfer to a Level I center.

Level II centers often find themselves in a kind of limbo. They have most of the specialties required, but those specialists may have varying comfort levels regarding addressing complex injuries. Some Level II centers may be able to keep these patients, but many will find that they need to transfer to their upstream Level I partner.

What do transferring trauma centers need to do before actually moving the patient? Here are some practical tips.

  • Evaluate quickly. The bottom line is to try to preserve function, so time is of the essence. Do a thorough evaluation of the anatomy, as well as vascular and neurologic status. These are the major determinants of salvageability.
  • Don’t ignore the rest of the patient. Make sure that injuries more critical than the extremity are identified and addressed. See the “Dang Factor!” below.
  • Make a decision. Now. Decide whether you need to transfer the patient based on your knowledge of your consultants’ skill levels and comfort.
  • Once you decide you will transfer, do no further imaging. It’s not going to change anything you do, and may not be very helpful to the receiving center.
  • Give IV antibiotics and the life-saving tetanus shot early.
  • Optimize salvageability. Do what you can to keep tissue healthy during the transfer. You must take transfer time into account for this! If you are sending your patient across town, just do it quickly. However, if he or she must travel long distance, there are a few more things to consider:
    • Try removing the tourniquet (if any). You’d be surprised at how many times the bleeding has stopped already. Or maybe wasn’t needed in the first place.
    • Selectively try to control bleeding if possible. Carefully ligate small vessels if you can. Don’t clamp and tie large masses of tissue.
    • Consider a vascular shunt. If there is an obvious large vessel injury, and if you have a trauma or vascular surgeon who is comfortable with inserting a vascular shunt, do it prior to transfer. This will increase the likelihood of salvage in long-distance transfers. But don’t waste a lot of time doing this! If you can’t get it done within about 30 minutes or so, don’t delay the transfer.
    • Quickly rinse off the area. Try to minimize the time that noxious stuff (dirt, gasoline, etc) is in contact with the tissues.
    • Splint well. You’ll need to be creative. But you don’t want additional tissue injury due to the extremity just flopping around.
  • Inquire about followup. Find out how the patient did, and discuss anything you could have done differently with the receiving center. As always, performance improvement is important!

Related posts:

Practical Tip: Making Sure The Last Chest Tube Hole Is In The Chest

I recently wrote about how the completion chest x-ray can lie after insertion of a chest tube. The chest x-ray image is a 2-D representation of the patient, but you really can’t tell where the tube lies in the third dimension (front to back). That’s how a trauma professional can get suckered into thinking they just put a perfect chest tube in, when in reality they have not.

How can you be sure of the position as you are putting it in? It’s a nuisance to have to reposition it after you’ve taken down your sterile field. Here are a few suggestions, but pay particular attention to the last one. I think it’s the best.

  • Make the incision large enough so that you can visually confirm that the last hole is inside the thoracic cavity. This option is somewhat okay for thinner patients. But it leads to a larger than necessary incision, especially in patients who are obese. Not a great idea.
  • Estimate proper depth before insertion.  Hold the tube over the patient’s chest, and note the distance mark printed on the tube when the tip is placed halfway across the hemithorax (just medial to the nipple). This does take into account the amount of soft tissue on the lateral chest, but is not terribly accurate and you may accidentally contaminate the tube. The usual depth for a patient with normal body habitus is 12-14 cm at the skin. A better choice.
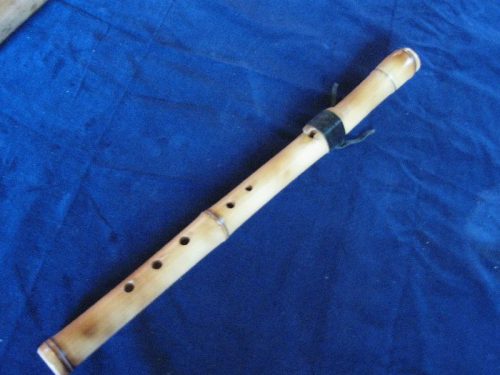
  • Use the “bamboo flute” technique. Once you have entered the pleural space and placed the end of the tube into it, locate and place your finger firmly over the last hole, like you were playing a flute. Keep it there as you slide the tube in until your finger contacts the ribs around the insertion point. It should be at a right angle to the chest wall. Then push it in another 2-4 cm. As long as you have performed a nice dissection down to the chest wall, this technique is close to foolproof. And double-check by making sure that the tube is at least 12-14 cm at the skin. IMHO, this is the best technique.

This is not a chest tube!

Related posts: