Category Archives: Equipment

How Does It Work? The Lowly Blood Pressure Cuff

The blood pressure cuff is one of those devices trauma professionals don’t give a second thought to. Old timers like me remember using the cuff with a sphygmomanometer and stethoscope to get manual blood pressures. I’ve had to do this twice in the past few years on airplanes, and I had forgotten how much work this is.

But technology makes things easier for us. Now you just slap a cuff on the arm (or wrist, or finger), push a button, and voila! You’ve got the pressure.

But have you stopped to think about how this actually works? Why don’t we need the stethoscope any more? Here’s the scoop:

When you take a manual blood pressure, the cuff is inflated until a pulse can no longer be auscultated with the stethoscope. The pressure is slowly released using a little thumb wheel while listening for the pulse again. The pressure at which it is first audible is the systolic, and the pressure at which it softens and fades away is the diastolic.

The automatic blood pressure device consists of a cuff, tubing that connects it to the monitor, a pressure transducer in line with the tubing, a mini air pump, and a small computer. The transducer replaces the analog pressure gauge, and the pump and computer replace the human.

The transducer can “see” through the tubing and into the cuff. It is very sensitive to pressure and pressure changes. The computer directs the pump to inflate to about 20 torr above the point where pulsations in the air column cease. It then releases the pressure at about 4 torr per second, “feeling” for air column vibrations to start. Using a manufacturer specific computer algorithm, the mean arterial pressure is measured. A little more proprietary calculation results in an estimated systolic and diastolic pressure.

bpcuff

Piece of cake! But here’s the question: is it accurate? In my next post, I’ll write about how the automated cuff compares to an indwelling arterial line.

Print Friendly, PDF & Email

EAST Guidelines: TEG And ROTEM In Coagulopathic Trauma Patients

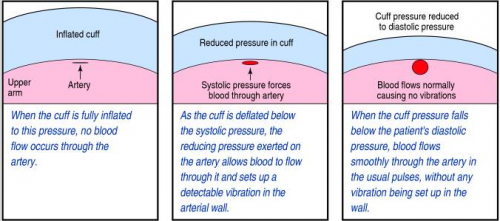
In my last post, I explained why TEG is not so easy to use. Today, I’ll share the new Eastern Association for the Surgery of Trauma (EAST) practice management guidelines for using TEG and its twin, ROTEM for bleeding patients.

TEG first appeared in the trauma literature in 2008. A paper by John Holcomb showed that it was superior to the standard lab tests (PT, aPTT, and activated clotting time) in monitoring hemorrhagic shock in pigs. Since then, research has exploded with TEG papers. There have been about 50 published annually for the last four years.

In this month’s Journal of Trauma, EAST published their most recent practice management guideline, dedicating it to TEG. They identified over 6,000 potential papers and ultimately settled on 38 articles. They used them to attempt to answer three questions regarding use of these devices during resuscitation.

Question 1

In adult trauma patients with ongoing hemorrhage, should TEG/ROTEM be used vs non-TEG/ROTEM monitoring to guide transfusion strategy in order to reduce mortality, blood product transfusions and the need for additional hemostatic interventions such as angioembolization, endoscopy, or operation?

Answer: Only seven studies were found regarding this question. All but one showed no difference in 24 hour and hospital mortality. They also showed an inconsistent effect on blood product usage with some showing no difference and some shower less transfused product.

Nonetheless, EAST “conditionally recommended” the use of TEG/ROTEM. This is based  solely on the presumption that it can reduce the risk of blood transfusions by using a test that is harmless.

Question 2

In adult surgery patients with ongoing hemorrhage, should TEG/ROTEM be used vs non-TEG/ROTEM monitoring to guide transfusion strategy in order to reduce mortality, blood product transfusions and the need for additional hemostatic interventions such as angioembolization, endoscopy, or operation? Note the shift here to non-trauma patients.

Twenty one studies were found addressing this question. Most papers showed no difference in reoperation rate. There were also no consistent differences in transfusion of various blood products. And the vast majority showed no difference in mortality.

But once again, EAST conditionally recommended the use of this test in these patients, mainly because it is believed to be harmless.

Question 3

In adult critically ill patients with ongoing hemorrhage, should TEG/ROTEM be used vs non-TEG/ROTEM monitoring to guide transfusion strategy in order to reduce mortality, blood product transfusions and the need for additional hemostatic interventions such as angioembolization, endoscopy, or operation?

There were only 10 studies relating to this question, and they included patients with a variety of surgical and medical problems. TEG/ROTEM was no better than non-TEG parameters in predicting the need to transfuse, but did somewhat better than clinical judgement. Once again, there was no consistent effect on the number of transfusions given, although some studies showed that use of non-TEG/ROTEM studies resulted in fewer units of red cells, platelets, and cryoprecipitate given.

Interestingly, although there was little difference in the number of units transfused, fewer patients required transfusion using TEG/ROTEM. There was no difference in mortality or interventions to stop bleeding.

Yet again, EAST conditionally recommended use of TEG/ROTEM in these patients despite the very low level of evidence. Again, this is mainly because of the lack of perceived harm in using it, and the possibility that it might reduce exposure to blood products.

Bottom line: Hmm. I remain skeptical. What EAST is saying is that, hey it’s harmless and there’s a chance that it might reduce a patient’s exposure to blood products, so why not? I have a vial of bat wings and eye of newt that might do the same thing. As long as it’s harmless, right?

Well, it may be clinically harmless, but it costs money and time. First, you have to buy the machine. Luckily, they are much cheaper than a CT scanner. But then the manufacturer kills you with the disposables. Like a cheap inkjet printer, you have to keep buying $40 ink cartridges every few weeks to keep it working. Except TEG cartridges cost more than $40.

And don’t overlook the time spent training people in how to interpret the curves. And developing a system to obtain the specimen and pay people to run the equipment. It all adds up, and yet the papers can’t show us any dramatic clinical results.

I’ll probably irritate the TEG/ROTEM true believers, but it still seems like a device searching for a great clinical problem to solve. IMHO we need much more high-quality research to help us figure out how this tool can help us with our trauma / surgical / critical care patients.

Reference: Thromboelastography and rotational thromboelastometry in bleeding patients with coagulopathy: Practice management guideline from the Eastern Association for the Surgery of Trauma. J Trauma 89(6):999-1017, 2020.

Print Friendly, PDF & Email

CT Contrast Via Intraosseous Catheter

The standard of care in vascular access in trauma patients is the intravenous route. Unfortunately, not all patients have veins that can be quickly accessed by prehospital providers. Introduction of the intraosseous device (IO) has made vascular access in the field much more achievable. And it appears that most fluids and medications can be administered via this route. But what about iodinated contrast agents via IO for CT scanning?

Physicians at Henry Ford Hospital in Detroit published a case report on the use of this route for contrast administration. They treated a pedestrian struck by a car with a lack of IV access sites by IO insertion in the proximal humerus, which took about 30 seconds. They then intubated using rapid sequence induction, with drugs injected through the IO device. They performed full CT scanning using contrast injected through the site using a power injector. Images were excellent, and ultimately the patient received an internal jugular catheter using ultrasound. The IO line was then discontinued.

This paper suggests that the IO line can be used as access for injection of CT contrast if no IV sites are available. Although it is a single human case, a fair amount of studies have been done on animals (goats?). The animal studies show that power injection works adequately with excellent flow rates.

The authors prefer using an IO placement site in the proximal humerus. This does seem to cause a bit more pain, and takes a little practice. A small xylocaine flush can be administered to reduce injection discomfort in awake patients. Additionally, the arm cannot be raised over the head for the torso portion of the scan.

Bottom line: CT contrast can be injected into an intraosseous line (IO) with excellent imaging results. Insert the IO in a site that you are comfortable with. I do not recommend power injection at this time. Although the marrow cavity can support it, the connecting tubing may not. Have your radiologist hand-inject and time the scan accordingly. And don’t be surprised if your radiology department doesn’t have a protocol for this!

Note: long term effects of iodinated contrast in the bone marrow are not known. For this reason, and because of smaller marrow cavities, this technique is not suitable for pediatric patients.

Reference: Intraosseous injection of iodinated computed tomography contrast agent in an adult blunt trauma patient. Annals Emerg Med 57(4):382-386, 2011.

Print Friendly, PDF & Email

Don’t Have A Pelvic Binder? Make Your Own! (Video)

During the past two posts, I’ve reviewed the various pelvic binders available and how much they cost. But what can you do if you find yourself in a situation where you need a binder but don’t have one?

It’s time to go MacGyver!

You need three things:

Yes, that’s right. A simple and cheap SAM splint, a tourniquet, and some kind of blade to cut the SAM splint with. Essentially, the SAM splint is the binder and the tourniquet is used to cinch it down in the correct position.

Here’s a video that demonstrates how to do it. Enjoy!

YouTube player
Print Friendly, PDF & Email

What’s The Best Pelvic Binder? Part 2

Yesterday, I detailed some pelvic binders commonly available in the US. Today, I’ll go through the (little) science there is regarding which are better than others.

And remember, tomorrow I’ll show you how to make a free pelvic binder out of stuff that all medics have in their rig.

There are a number of factors to consider when choosing one of these products. They are:

  • Does it work?
  • Does it hurt or cause skin damage?
  • Is it easy to use?
  • How much does it cost?

It’s difficult to determine how well binders work in the live, clinical setting. But biomechanical studies can serve as a surrogate to try to answer this question. One such cadaver study was carried out in the Netherlands a few years ago. They created one of three different fracture types in pelvis specimens. Special locator wires were placed initially so they could measure bone movement before and after binder placement. All three of the previously discussed commercial binders were used.

Here are the factoids:

  • In fracture patterns that were partially stable or unstable, all binders successfully closed the pelvic ring.
  • None of the binders caused adverse displacements of fracture fragments.
  • Pulling force to achieve complete reduction was lowest with the T-POD (40 Newtons) and highest with the SAM pelvic sling (120 Newtons). The SAM sling limits compression to 150 Newtons, which was more than adequate to close the pelvis.

So what about harm? A healthy volunteer study was used to test each binder for tissue pressure levels. The 80 volunteers were outfitted with a pressure sensing mat around their pelvis, and readings were taken with each binder in place.

Here are the additional factoids:

  • The tissue damage threshold was assumed to be 9.3 kPa sustained for more than 2-3 hours based on the 1994 paper cited below.
  • All binders exceeded the tissue damage threshold at the greater trochanters and sacrum while lying on a backboard. It was highest with the Pelvic Binder and lowest with the SAM sling.
  • Pressures over the trochanters decreased significantly after transfer to a hospital bed, but the Pelvic Binder pressures remained at the tissue damage level.
  • Pressures over the sacrum far exceeded the tissue damage pressure with all binders on a backboard and it remained at or above this level even after transfer to a bed. Once again, the Pelvic Binder pressures were higher. The other splints had similar pressures.

And finally, the price! Although your results may vary due to your buying power, the SAM sling is about $50-$70, the Pelvic Binder $140, and the T-POD $125.

Bottom line: The binder that performed the best (equivalent biomechanical testing, better tissue pressure profile) was the SAM sling. It also happens to be the least expensive, although it takes a little more elbow grease to apply. In my mind, that’s a winning combo. Plus, it’s narrow, which allows easy access to the abdomen and groins for procedures. But remember, whichever one you choose, get them off as soon as possible to avoid skin complications.

References:

  • Comparison of three different pelvic circumferential compression devices: a biomechanical cadaver study. JBJS 93:230-240, 2011.
  • Randomised clinical trial comparing pressure characteristics of pelvic circumferential compression devices in healthy volunteers. Injury 42:1020-1026, 2011.
  • Pressure sores. BMJ 309(6959):853-857, 1994.
Print Friendly, PDF & Email