All posts by The Trauma Pro

The July Trauma MedEd Newsletter Is Coming Soon: The Receiving Trauma Center

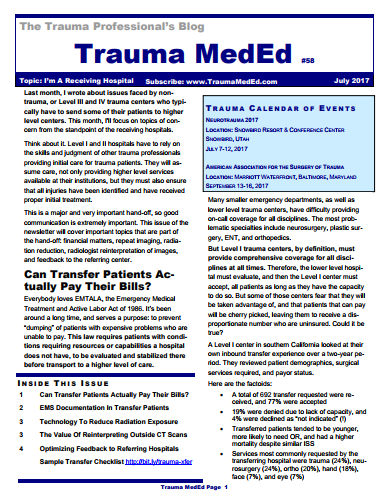
I’m going to send out the next edition of the Trauma MedEd newsletter over the holiday weekend. This is a follow-on newsletter to the previous one on hospitals that have to transfer patients out to other trauma centers. The emphasis in this one is on the receiving trauma center.

Here are some of the topics:

  • CT scans: to repeat or not
  • Reducing radiation exposure
  • Radiologist reinterpretation of imaging from referring hospitals
  • Providing feedback to your referring hospitals
  • And more!

And I’ll provide a Word document of a sample feedback form that you can adapt to your needs.

As always, this issue will go to all of my subscribers first. If you are not yet one of them, click this link to sign up and/or download back issues.

Unfortunately, non-subscribers will have to wait until I release the issue on this blog, about 10 days later. So sign up now!

Practical Tip: Making Sure The Last Chest Tube Hole Is In The Chest

I recently wrote about how the completion chest x-ray can lie after insertion of a chest tube. The chest x-ray image is a 2-D representation of the patient, but you really can’t tell where the tube lies in the third dimension (front to back). That’s how a trauma professional can get suckered into thinking they just put a perfect chest tube in, when in reality they have not.

How can you be sure of the position as you are putting it in? It’s a nuisance to have to reposition it after you’ve taken down your sterile field. Here are a few suggestions, but pay particular attention to the last one. I think it’s the best.

  • Make the incision large enough so that you can visually confirm that the last hole is inside the thoracic cavity. This option is somewhat okay for thinner patients. But it leads to a larger than necessary incision, especially in patients who are obese. Not a great idea.
  • Estimate proper depth before insertion.  Hold the tube over the patient’s chest, and note the distance mark printed on the tube when the tip is placed halfway across the hemithorax (just medial to the nipple). This does take into account the amount of soft tissue on the lateral chest, but is not terribly accurate and you may accidentally contaminate the tube. The usual depth for a patient with normal body habitus is 12-14 cm at the skin. A better choice.
  • Use the “bamboo flute” technique. Once you have entered the pleural space and placed the end of the tube into it, locate and place your finger firmly over the last hole, like you were playing a flute. Keep it there as you slide the tube in until your finger contacts the ribs around the insertion point. It should be at a right angle to the chest wall. Then push it in another 2-4 cm. As long as you have performed a nice dissection down to the chest wall, this technique is close to foolproof. And double-check by making sure that the tube is at least 12-14 cm at the skin. IMHO, this is the best technique.

This is not a chest tube!

Related posts:

Tongue Piercings And Emergency Intubation

Urgent and emergent intubation is challenging enough, but what if your patient is sporting some type of tongue piercing? Does it make a difference? Do you need to do anything differently?

Obviously, the jewelry may physically impede the process of intubating the patient, impairing visualization of structures or getting in the way of inserting the tube. It can also cause complications later down the road, such as pressure necrosis from the tube coming into contact with it.

The anesthesia literature recommends removing all oral jewelry prior to elective intubation, or declining to do the case if the patient refuses. Unfortunately, trauma professionals do not have that option when the patient needs an emergency airway.

Here are some pointers for dealing with oral jewlry:

  • Is the item going to impede insertion of the airway? Is it large, or obstructing the usual tube pathway? If so, remove it quickly (see below).
  • Sweep the tongue well to the side during tube insertion to avoid the jewelry. You may need an assistant to grasp it with gauze to keep it out of the way.
  • Once the airway is secured, remove the item. This takes two people! The ET tube should be moved to the side, and one person will grasp the tongue with a gauze pad and extend it. The other person can then grasp the jewelry with gloved fingers, and unscrew the ball on one side. It can then be removed and saved in an envelope.

Note: both hands must always be in contact with the jewelry at all times! It is slippery, and if the pieces are not controlled, this can happen!

Sharp stud foreign body in the bowel from tongue piercing that came apart and was swallowed (arrow). Images courtesy of Intermountain Medical Imaging, Boise, Idaho.


What’s The Best Chest Seal For Sucking Chest Wounds?

The treatment of a “sucking chest wound” in the field has typically been with application of some type of occlusive dressing. Many times, a generic adhesive dressing is applied, typically the same kind used to cover IV sites. This is quick, easy, cheap, and readily available in the ambulance. But there is a danger that this could result in development of tension pneumothorax, because the dressing not only keeps air from getting in but also keeps any buildup of pneumothorax from getting out.

To avoid this, a number of vented products have been developed and approved by the US Food and Drug Administration (FDA). These devices have some sort of system to allow drainage of accumulating air or blood, typically a one-way valve or drainage channels. They also need to stick well to a chest wall, which may have blood or other fluids that might disrupt the seal completely.

The US Army has a strong interest in making sure the products they use for this purpose work exactly as promised. The US Army Institute of Surgical Research examined 5 currently FDA-approved products to determine their ability to adhere to bleeding chest wounds, and to drain accumulating air and/or blood from the pleural space. They developed an open chest wound with active bleeding in a swine model.

An open hemopneumothorax was created by infusing air and blood, the animal was stabilized, then additional aliquots of air and blood were infused to simulate ongoing bleeding and air buildup. The image below shows the 5 products used and the animal setup:

Here are the factoids:

  • Creation of the open hemopneumothorax caused the intrapleural pressure to move toward atmospheric pressure as expected, resulting in labored breathing and reduced O2 saturation
  • Sealing the wound with any of the chest seal products corrected all of the problems just noted
  • Chest seals with one way valves did not evacuate blood efficiently (Bolin and SAM). The dressings either detached due to pooled blood, or the vent system clogged from blood clot.
  • Seals with laminar channels for drainage (see the pig picture above) allowed easy escape of blood and air
  • Success rates were 100% for Sentinel and Russell, 67% for HyFin, 25% for SAM, and 0% for Bolin

Bottom line: Prehospital providers need to be familiar with the products they use to cover open chest wounds. Totally occlusive dressings can result in development of a tension pneumothorax if there is an ongoing air leak from the lung. Vented chest seals are preferable for these injuries. Just be aware that vented seals with drainage channels perform much better than those that rely on a one-way valve.

Reference: Do vented chest seals differ in efficacy? An experimental
evaluation using a swine hemopneumothorax model. J Trauma 83(1):182-189, 2017.

Does The Tertiary Survey Really Work?

Delayed diagnoses / missed injuries are with us to stay. The typical trauma activation is a fast-paced process, with lots of things going on at once. Trauma professionals are very good about doing a thorough exam and selecting pertinent diagnostic tests to seek out the obvious and not so obvious injuries.

But we will always miss a few. The incidence varies from 1% to about 40%, depending on who your read. Most of the time, they are subtle and have little clinical impact. But some are not so subtle, and some of the rare ones can be life-threatening.

The trauma tertiary survey has been around for at least 30 years, and is executed a little differently everywhere you go. But the concept is the same. Do another exam and check all the diagnostic tests after 24 to 48 hours to make sure you are not missing the obvious.

Does it actually work? There have been a few studies over the years that have tried to find the answer. A paper was published that used meta-analysis to figure this out. The authors defined two types of missed injury:

  • Type I – an injury that was missed during the initial evaluation but was detected by the tertiary survey.
  • Type II – an injury missed by both the initial exam and the tertiary survey

Here are the factoids:

  • Only 10 observational studies were identified, and only 3 were suitable for meta-analysis
  • The average Type I missed injury rate was 4.3%. The number tended to be lower in large studies and higher in small studies.
  • Only 1 study looked at the Type II missed injury rate – 1.5%
  • Three studies looked at the change in missed injury rates before and after implementation of a tertiary survey process. Type I increased from 3% to 7%, and Type II decreased from 2.4% to 1.5%, both highly significant.
  • 10% to 30% of missed injuries were significant enough to require operative management

Bottom line: In the complex dance of a trauma activation, injuries will be missed. The good news is that the tertiary survey does work at picking up many, but not all, of the “occult” injuries. And with proper attention to your patient, nearly all will be found by the time of discharge. Develop your process, adopt a form, and crush missed injuries!

Related posts:

Reference: The effect of tertiary surveys on missed injuries in trauma: a systematic review. Scand J Trauma Resusc Emerg Med 20:77, 2012.