Don’t Have A Pelvic Binder? Make Your Own! (Video)

During the past two posts, I’ve reviewed the various pelvic binders available and how much they cost. But what can you do if you find yourself in a situation where you need a binder but don’t have one?

It’s time to go MacGyver!

You need three things:

Yes, that’s right. A simple and cheap SAM splint, a tourniquet, and some kind of blade to cut the SAM splint with. Essentially, the SAM splint is the binder and the tourniquet is used to cinch it down in the correct position.

Here’s a video that demonstrates how to do it. Enjoy!

YouTube player

What’s The Best Pelvic Binder? Part 2

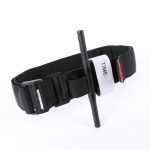
Yesterday, I detailed some pelvic binders commonly available in the US. Today, I’ll go through the (little) science there is regarding which are better than others.

And remember, tomorrow I’ll show you how to make a free pelvic binder out of stuff that all medics have in their rig.

There are a number of factors to consider when choosing one of these products. They are:

  • Does it work?
  • Does it hurt or cause skin damage?
  • Is it easy to use?
  • How much does it cost?

It’s difficult to determine how well binders work in the live, clinical setting. But biomechanical studies can serve as a surrogate to try to answer this question. One such cadaver study was carried out in the Netherlands a few years ago. They created one of three different fracture types in pelvis specimens. Special locator wires were placed initially so they could measure bone movement before and after binder placement. All three of the previously discussed commercial binders were used.

Here are the factoids:

  • In fracture patterns that were partially stable or unstable, all binders successfully closed the pelvic ring.
  • None of the binders caused adverse displacements of fracture fragments.
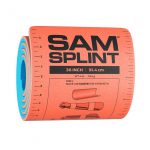
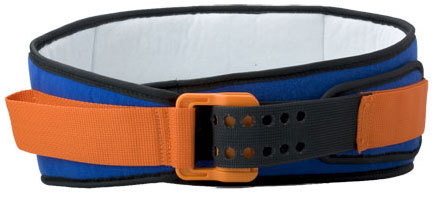
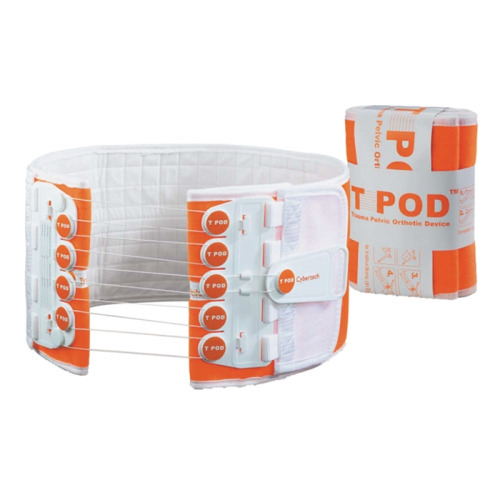
  • Pulling force to achieve complete reduction was lowest with the T-POD (40 Newtons) and highest with the SAM pelvic sling (120 Newtons). The SAM sling limits compression to 150 Newtons, which was more than adequate to close the pelvis.

So what about harm? A healthy volunteer study was used to test each binder for tissue pressure levels. The 80 volunteers were outfitted with a pressure sensing mat around their pelvis, and readings were taken with each binder in place.

Here are the additional factoids:

  • The tissue damage threshold was assumed to be 9.3 kPa sustained for more than 2-3 hours based on the 1994 paper cited below.
  • All binders exceeded the tissue damage threshold at the greater trochanters and sacrum while lying on a backboard. It was highest with the Pelvic Binder and lowest with the SAM sling.
  • Pressures over the trochanters decreased significantly after transfer to a hospital bed, but the Pelvic Binder pressures remained at the tissue damage level.
  • Pressures over the sacrum far exceeded the tissue damage pressure with all binders on a backboard and it remained at or above this level even after transfer to a bed. Once again, the Pelvic Binder pressures were higher. The other splints had similar pressures.

And finally, the price! Although your results may vary due to your buying power, the SAM sling is about $50-$70, the Pelvic Binder $140, and the T-POD $125.

Bottom line: The binder that performed the best (equivalent biomechanical testing, better tissue pressure profile) was the SAM sling. It also happens to be the least expensive, although it takes a little more elbow grease to apply. In my mind, that’s a winning combo. Plus, it’s narrow, which allows easy access to the abdomen and groins for procedures. But remember, whichever one you choose, get them off as soon as possible to avoid skin complications.

References:

  • Comparison of three different pelvic circumferential compression devices: a biomechanical cadaver study. JBJS 93:230-240, 2011.
  • Randomised clinical trial comparing pressure characteristics of pelvic circumferential compression devices in healthy volunteers. Injury 42:1020-1026, 2011.
  • Pressure sores. BMJ 309(6959):853-857, 1994.

What’s The Best Pelvic Binder? Part 1

Several products for compressing the fractured pelvis are available. They range from free and simple (a sheet), to a bit more complicated and expensive. How to decide which product to use? Today, I’ll discuss the four commonly used products. Tomorrow, I’ll look at the science. And on Wednesday, I’ll show you a creative way to make your own free pelvic binder.

First, let’s dispense with the sheet. Yes, it’s very cheap. But it’s not easy to use correctly, and more difficult to secure.

There are three commercial products that are commonly used. First is the Pelvic Binder from the company of the same name (www.pelvicbinder.com). It consists of a relatively wide belt with a tensioning mechanism that attaches to the belt using velcro. One size fits all, so you may have to cut down the belt for smaller patients. Proper tension is gauged by being able to insert two fingers under the binder.

Next is the SAM Pelvic Sling from SAM Medical Products (http://www.sammedical.com). This device is a bit fancier, is slimmer, and the inside is more padded. It uses a belt mechanism to tighten and secure the sling. This mechanism automatically limits the amount of force applied to avoid problems with excessive compression. It comes in three sizes, and the standard size fits 98% of the population, they say.

Finally, there is the T-POD from Pyng Medical (http://www.pyng.com/products/t-podresponder). This one looks similar to the Pelvic Binder in terms of width and tensioning. It is also a cut to fit, one size fits all device. It has a pull tab that uses a pulley system to apply tension. Again, two fingers must be inserted to gauge proper tension.

So those are the choices. Tomorrow, I’ll go over some of the data and pricing so you can make intelligent choices about selecting the right device for you.

Do You Really Need To Repeat That Trauma Bay Xray?

It happens all the time. You get that initial chest and/or pelvic xray in the resuscitation room while evaluating a blunt trauma patient. A few minutes later the tech returns with another armful of xray plates to repeat them. Why? The patient was not centered properly and part of the image is clipped.

Where is the left side of the chest, and do we care?

Do you really need to go through the process of setting up again, moving the xray unit in, watching people run out of the room (if they are not wearing lead, and see my post below about how much radiation they are really exposed to), and shooting another image? The answer to the question lies in what you are looking for. Let’s address the two most common (and really the only necessary) images needed during early resuscitation of blunt trauma.

First, the chest xray. You are really looking for 3 things:

  • Big air (pneumothorax)
  • Big blood (hemothorax)
  • Big mediastinum (hinting at aortic injury)

Look at the clipped xray above. A portion of the left chest wall is off the image. If there were a large pneumothorax on the left, would you be able to see it? What about a large hemothorax? And the mediastinum is fully included, so no problem there. So in this case, no need to repeat immediately.

The same thing goes for the pelvis. You are looking for gross disruption of the pelvic ring, especially posteriorly because this will cause you to intervene in the ED (order blood, consider wrapping the pelvis). So if parts of the edges or top and bottom are clipped, no big deal.

Bottom line: Don’t let the xray tech disrupt the team again by reflexively repeating images that are not technically perfect. See if you can use what you already have.  And how do you decide if you need to repeat it later, if at all? Consider the mechanism of injury and the physical exam. Then ask yourself if there is anything you could possibly see that was not imaged the first time that would change your management in any way. If not, you don’t need it. But it certainly will irritate the radiologists!

CIWA Protocol Precautions

The post entitled “CIWA Demystified” is one of the most popular on this blog. This type of symptom triggered therapy for alcohol withdrawal applies some degree of objectivity to a somewhat subjective problem. However, it is possible to take it too far.

A retrospective review of registry patients who received CIWA guided therapy was performed. A total of 124 records were reviewed for appropriateness of CIWA useand adverse events. They found that only about half of patients (48%) met both usage criteria (able to communicate verbally, recent alcohol use). And 31% did not meet either criterion! There were 55 nondrinkers in this study, and even though 64% of them could communicate that fact, they were placed on the protocol anyway! Eleven patients suffered adverse events (delirium tremens, seizures, death). Four of them did not meet criteria for use of the protocol.

Bottom line: In order to be placed on the CIWA protocol, a patient must have a recent history of alcohol use, and must be able to communicate verbally. Some physicians assume that patients with autonomic hyperactivity or psychological distress are withdrawing and order the CIWA protocol. This can  cover up other causes of delirium, or may make it worse by administering benzodiazepines. This represents inappropriate use of the protocol!

Related post: The CIWA Protocol Demystified

Reference: Inappropriate use of symptom-triggered therapy for alcohol withdrawal in the general hospital. Mayo Clin Proc 83(3):274-279, 2008.