Yesterday, I wrote about ways to reduce and hopefully eliminate retained foreign bodies (instruments, sponges) during damage control surgery. Today, I’ll provide a sample x-ray and some tips on how to use this tool most effectively.
Here is an abdominal x-ray obtained just prior to closure of a patient who underwent damage control laparotomy. The OR record and surgeon from the initial operation documented that four sponges had been left in place for hemostasis.
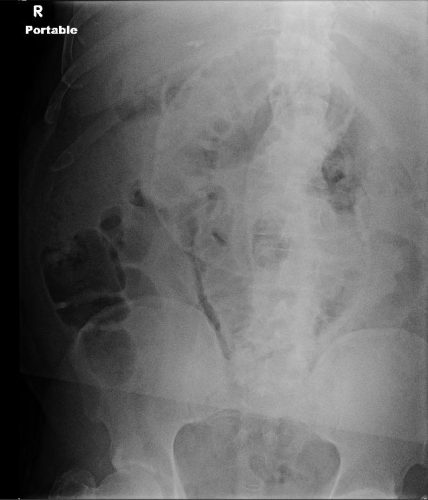
Nothing retained, right?
Wrong! This image is not complete. This patient is larger than the x-ray plate used. The area under the diaphragms, the pelvis, and the entire left side of the peritoneal cavity have not been visualized.
Tips for imaging for damage control closure:
- Always make sure the patient is on an x-ray OR table. It is so annoying (and potentially a sterility problem) to have to slide the plate under the patient!
- Help the radiology tech to locate the desired imaging field using folds in the towels covering the body region. For example place the confluence of folds in the center of the towel in the exact place you want the center of the x-ray to be.
- Remove all radiopaque objects from the x-ray field to reduce confusion when interpreting the image
- Make sure the entire body cavity has been imaged! This may mean bracketing the area with several shots.
- Read the image yourself! But if in doubt, or in patients with drains or other odd objects, call the radiologist to help you out.
Related posts:
- What does a retained surgical sponge look like?
- The final x-ray in damage control closure
- A sample damage control x-ray
